Saturday 31 October 2015

Making faux batik

Today is the fifth Saturday of the month - and that means over at Twofers we have a tutorial. This month it is my turn to produce the tutorial and I decided to resurrect the old technique of using stamping and embossing to create faux batik. This was very popular in the days when we all had a huge stash of Mulberry paper!

Do please pop over there and have a look at how I created the batik style background paper I have used on this card - and while you're there, how about making a note to check out our next challenge which will go live this time next week? We'd love it if you joined in!


I am sharing this with
Ooh La la Challenge Blog - Embossing
Crafty Creations Challenges - Colourful
Crafty Gals Corner - Anything Goes
Sweet Stampin' - Die cuts /punches
Craft Your Passion - Anything Goes
Shopping Our Stash - Go Paperless     

Thursday 29 October 2015

RECIPE: Butternut squash with feta and pomegranate

This is a total fridge dive dish - if you follow me on Facebook or Twitter, you'll know that I've spent most of this week waiting around for repair men, which has meant no chance to go shopping. So last night's dinner was very much a fridge-dive affair. Which made it perfect for a #KitchenClearout creation to share at Madhouse Family Reviews.

I pulled out of the fridge the end of a butternut squash, about a third of a packet of feta cheese that was threatening to walk out by itself, and half a pomegranate. So there are no set quantities, use as much of each as you happen to have!

I cut the squash into slices 1cm thick - I decided to leave the skin on as I was slicing it relatively thinly, so it wouldn't collapse, but as neither of us likes eating the skin I think with hindsight I would peel it and cut larger chunks. I tossed the slices and a small thinly sliced onion in about 1tbs of rapeseed oil, ½ teaspoon dried oregano, a good pinch of dried chilli flakes, salt and pepper, then spread it in a roasting tray and cooked in a hot oven for about 40 minutes, turning the slices once.

When it came out of the oven, I scattered over the pomegranate seeds and the crumbled feta.

The sharp, salty feta, sweet, soft squash and juicy, crunchy pomegranate seeds made a wonderful combination that I'm going to be repeating in future! I think it looks rather wonderful too, but Mark says it looks like something you'd see on the pavement outside the kebab shop late on a Friday night....

Oh just an afterthought, this could be done with pumpkin instead and would make a great way of using up whatever you've scraped out of your Halloween pumpkin!

Print Friendly and PDF

http://madhousefamilyreviews.blogspot.co.uk/2015/10/kitchenclearout-september-roundup-and.html

And more snow!

I've been going snow crazy today - odd as it's actually very mild for the time of year.

For this card, I created a background using distress inks in pink and two shades of blue. I dabbed the inkpads onto scrap acetate then used a waterbrush to paint them randomly over the paper, finishing the whole thing with a spritz of water just in case it wasn't already messy enough.

Once the background was dry, I stamped the greeting (a magazine freebie) in black Memento ink  and the snowflake, an oldie from my collection (I think it was from Hero Arts) in silver, embossing it with silver powder


I'm joining in with

Christmas Card Challenges - Anything Goes
Crafty Gals Corner - Anything Goes
Shopping Our Stash - Go paperless!
Fab'n'Funky - Christmas   

Snow, snow, thick thick snow....

Recently I've rediscovered the joy of  embossed resist - not that you'd know it, because my post about it is scheduled for a good few days from now! But having made the card-you-don't-yet-know-about, I've been looking around for other ideas for using it. And it's a great way to make a white stamped snowflake stand out against a blue background, lovely for a Christmas card.

For this card, I stamped the large snowflake twice on a strip of paper, leaving a gap between them, and embossed it with white opaque powder. The stamp is an old PSX one, the date on it is 1991! Then I sponged the two inks from the light turquoise end of the Kaleidacolour "Blue Breeze" pad all over the paper, wiped any residue off the stamping with a tissue and trimmed it into a strip to fit the card. The space in between the snowflakes was to allow me to wrap turquoise twine around the strip before sticking it down.

A stamped greeting and some pale blue sequins that are officially flowers but today are acting the part of snowflakes are the finishing touches.

 
Well, so much for taking photos on a gloomy day, even with flash the white has come out looking cream and the turquoise has come out looking blue!
 
I am sharing this with
 
Ooh La La Creations - Emboss
Shopping Our Stash - Go Paperless! 
52 Christmas Card Throwdown - Resist Embossing 
Addicted to Stamps and More - Holiday    

Wednesday 28 October 2015

The same - but different!

I've been playing around with some of my snippets, using the same dies and layout to get two completely different cards, one with an autumn look and the other with a winter one. The die set is one of the docrafts Create-a-scene sets used with the Grand Calibur; I used just two of the tree dies and on one card I added the fox, on the other I added an owl which in fact came from another set in the same range. Scraps of patterned paper from a DCWV stack formed backgrounds to the two cards.

I'm particularly pleased with the effect of cutting one payer of trees with the woodgrain effect paper - what a pity that was my last scrap of it! I think I'll have to buy more.


I'm joining in with

Christmas Card Challenges - Anything Goes (winter card)
Cuttlebug Mania - Trees (the pair of cards)
Clear it Out - Halloween or Christmas /Die Cuts (the pair of cards)
Glitter and Sparkle - Fall/Autumn (autumn card)
Pixies Snippets Playground week 200 (the pair of cards)
Use Your Stuff - die cuts/punches (the pair of cards)

RECIPE: Bonfire Night Hotpot

This recipe has been developed for the lovely people at Farmers Choice who supplied me with the beef, swede and beetroot I used in making the meal.

When I was a child growing up in the North of England in the 1950s, Halloween was virtually unmarked. There were no trick-or-treaters, no costumes, and no pumpkins. We might carve a turnip (our local name for a swede) into a lantern, and tea might have been followed by a toffee apple, but that’s about as much fuss as we ever made of it. I think the general attitude was “If we can’t live up to the standards of the Lancashire Witches, we just aren’t going to try”.  

Instead, all the fuss was made about Bonfire Night, also known as Guy Fawkes Night on November 5th. And ALWAYS on November 5th – never the nearest weekend or the first dry night. November 5th it was, come rain or (moon)shine.

There were no organised firework displays -  we all set off a few fireworks in our own back gardens or went to a bonfire set up by a group of neighbours, taking along our own fireworks. For weeks before hand, children stood on street corners or went from door to door with a hand made Guy Fawkes, asking for a “Penny for the guy”. Those pennies, along with pocket money, went towards buying fireworks. Every corner shop, sweet shop and newsagent sold them, and there was no law against children going in to buy them themselves. That meant some of the naughtier children used to light jumping jacks in the school playground, or push bangers through the doors of terraced houses that opened directly on to the street! Needless to say, hospital casualty departments got very busy at that time of year which is why these days there is an age limit for buying fireworks and most people prefer the relative safety and spectacle of a big organised display.

As well as bonfires and fireworks, Bonfire Night was all about food. The only date in our family calendar apart from Christmas and Easter to be marked by special dishes, as far as I can recall.

Early in the evening my grandmother would arrive from her home a few streets away, and I would wait at the window until she was close enough for me to run to greet her, knowing that her handbag and pockets would be full of rich, dark treacle toffee, bought from a slab in the sweet shop and cracked into chunks with a hammer.

 Before we went out to set off our fireworks, we would all eat a piece of Ginger Parkin, the sticky, spicy cake that we only ever had on that day of the year, to keep out the cold while we were outside, then we trooped out into the garden where Dad was in charge of lighting the fireworks.

Shortly before the fireworks were all used up, Mum and Grandma would slip into the house to get our meal ready. There would already be a Lancashire Hotpot in the oven – it would have been there all afternoon. Dad would keep us busy by allowing us to hold sparklers and showing us how to write our names in the air with them, while Mum and Grandma prepared mashed carrots and turnips (swede, of course, probably what had been carved out to make the lantern five days earlier) accompanied by sliced beetroot – always in the same glass dish and (to my mind) ruined by being doused in malt vinegar, and a jar of pickled red cabbage. The smell in the kitchen when we finally came indoors was wonderful!  

The memory of those bonfire nights is what I’ve tried to recreate here, but first a word about Lancashire Hotpot. In its purest form, it contains nothing more than lamb, potatoes and onions. In poorer times, the lamb was bulked out with oysters to save money (!!!!). But when I was a child, my Mum, like many of her friends, would use whatever meat was to hand, often beef and occasionally a tin of corned beef. The corned beef version was quite delicious, I must try to replicate it. Even now, approaching her 90th birthday, she sometimes replaces the lamb with chicken which is a great way to make a rather dry supermarket chicken breast moist and tender. She still sticks to one important rule though – it MUST be cooked in a brown glazed lidded pot. And she’s right, it really doesn’t taste the same cooked in anything else!


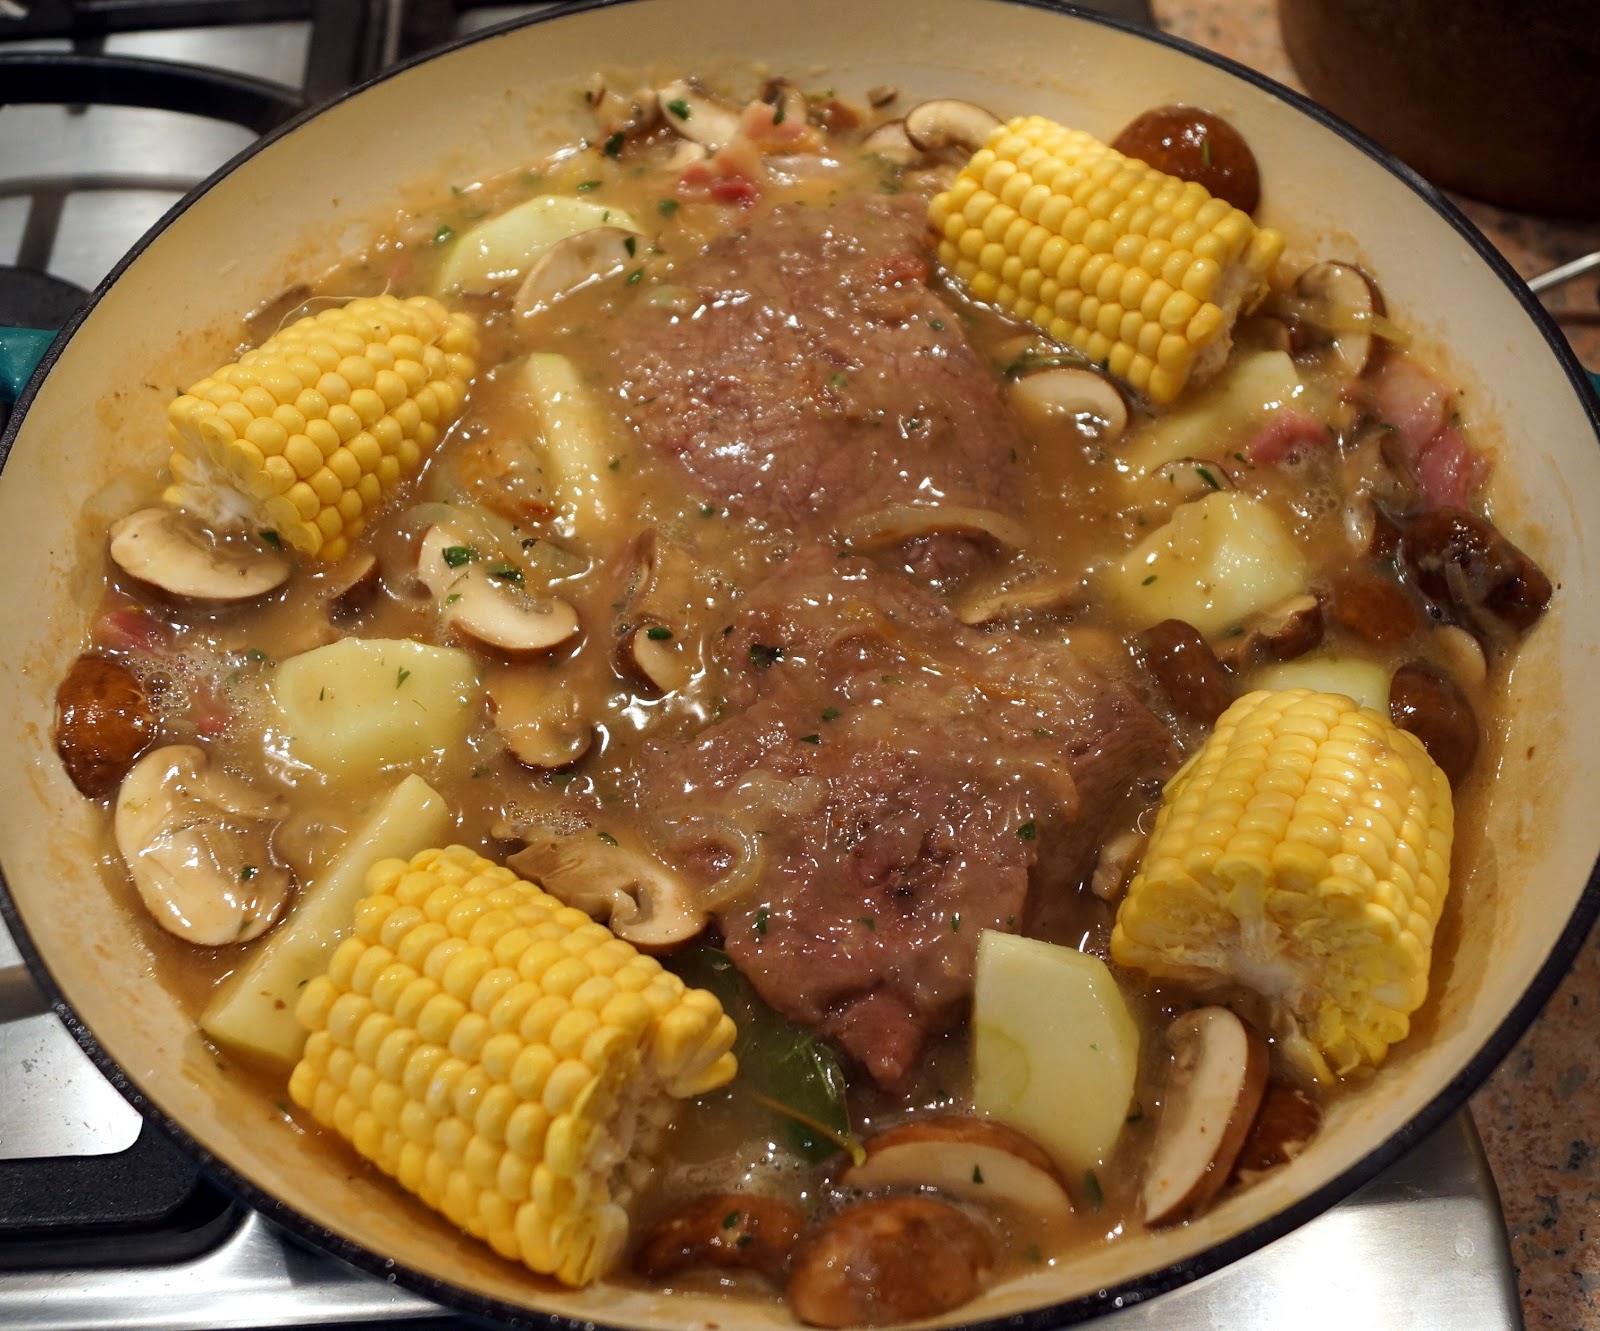
I decided not to call my dish Lancashire Hotpot, as I wanted to use beef and to try incorporating the carrot, turnip and beetroot into the dish. In the event, I had an upset tummy and decided to serve the beetroot on the side so I could just eat a small amount of it, as it often irritates my stomach and I didn’t want to take any risks. So having strayed so far from Lancashire Hotpot, here is my recipe for Bonfire Night Hotpot.

 
Bonfire Night Hotpot (serves 3-4)

 
Ingredients

350g diced lean stewing beef
1 large onion, thinly sliced
2-3 large baking potatoes
300g carrots
300g swede
1 heaped tbs plain flour
seasoning
water
a little lard or butter

 Pre-heat the oven to 150 C/300 F/ Gas Mark 2

 Put the flour in a plastic bag and season well. You’re not going to be adding any stock so you’ll need plenty seasoning. Tip the beef into the bag, shake well to mix and set aside, still in the bag.

 Grease a large lidded casserole dish, preferably a  traditional old fashioned glazed brown one.

 Peel and slice the potatoes, carrots and swede  - there’s no need to be too fussy about making nice thin even slices, this is a hearty rustic dish after all – but do try to have a few nice even slices of potato for on the top.


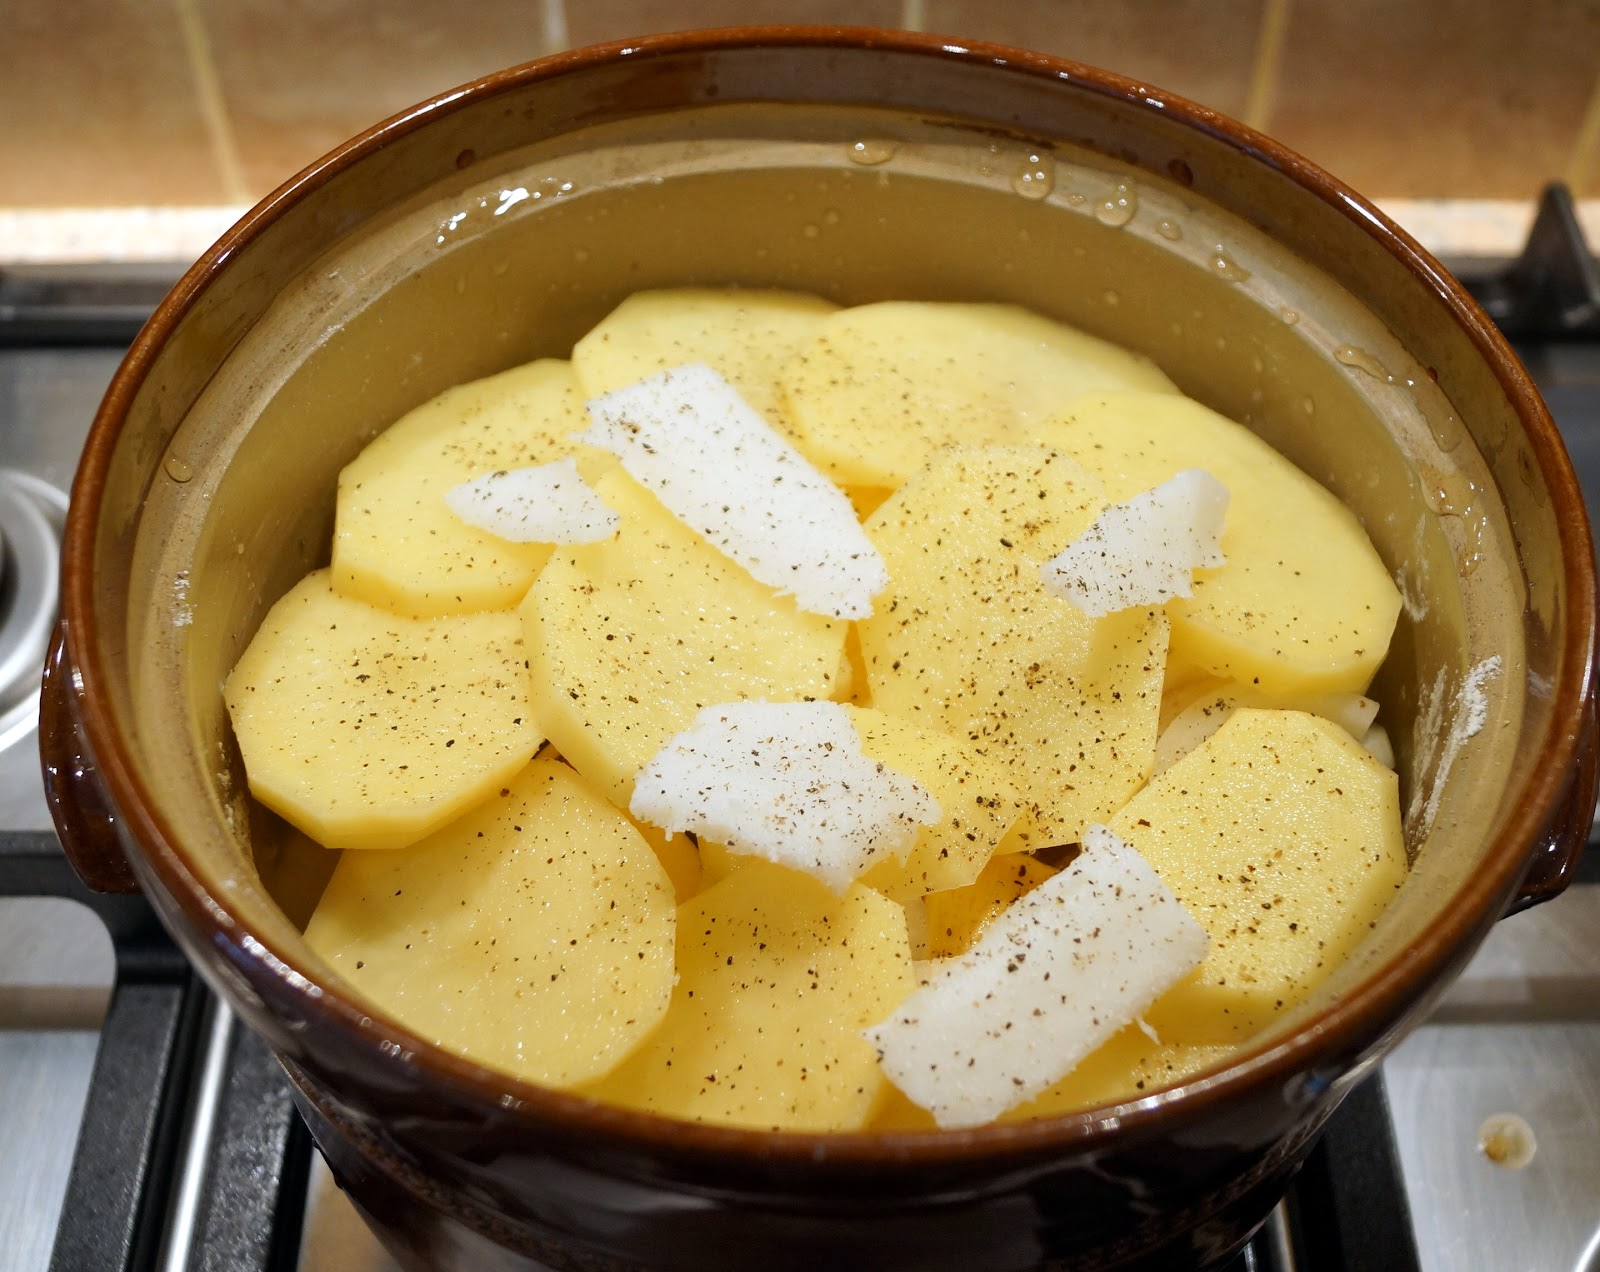
Arrange in the casserole: half the carrot and swede, followed by half the onions then half the potatoes. Now tip out the whole of the bag of beef, unused flour included, on top of the veg and spread it out evenly. Then repeat the layers of veg, arranging the top layer of potatoes in slightly overlapping rings around the top. Pour in cold water to just below the top layer of potatoes, dot the top with lard (preferably) or butter, cover and place in the oven to cook for around 5 hours.

 About 30 minutes before serving, turn up the oven temperature to 190C/ 375F/ Gas mark 5. remove the hotpot from the oven, remove the lid and use the back of a spoon to press the potatoes down lightly so a little of the liquid runs over the edges to help them to crisp up. Return to the oven without a lid for the rest of the cooking time.  


 Serve with sliced boiled beetroot (hold the malt vinegar!) and pickled red cabbage. Or for a change, why not try cidered red cabbage?


Cidered Red Cabbage (serves 4)

 Ingredients

 Half a small red cabbage, thinly shredded
1 large onion, peeled and sliced
1 Bramley apple, peeled, cored and sliced
250ml dry cider
1 tbs balsamic vinegar
1 tbs brown sugar or black treacle

 Simply mix all the ingredients together in a lidded casserole dish, add a knob of butter if you wish and cook in a low oven for at least 3 hours. If you are serving this with the hotpot, it will happily cook for the full 5 hours but do check it from time to time in case it has dried out, adding a little water if necessary.


Print Friendly and PDF

I'm sharing this with the Slow Cooked Challenge at Baking Queen 74 and Farmersgirl Kitchen

Slow-Cooked-Challenge-0915-2

Tuesday 27 October 2015

RECIPE: Veg-crammed cottage pie

Here is another recipe written for Farmer's Choice. The delicious ingredients they provided me with for this recipe were minced steak, swede and butternut squash.


Veg-crammed cottage pie  (serves 4)

for filling:

340g minced steak
1 medium onion, chopped
1 tbs plain flour
300ml beef stock
1 dessertspoon Worcestershire sauce
1 large carrot, diced
125g chestnut mushrooms, wiped and sliced
 

for topping:

300g swede, peeled and cut into small chunks (about 2-3cm)
2 large baking potatoes, peeled and cut into medium chunks (about 4-5 cm)
300g butternut squash, peeled and cut into medium chunks
black pepper
small knob of butter

First prepare the filling. Place the meat and onions in a flameproof casserole over a fairly high heat and cook, stirring frequently, until the meat is browned and the onion softened. Remove from the heat and blend in the flour followed by the stock and Worcestershire sauce. Return to the heat and bring to the boil, stirring constantly. Stir in the carrots and mushrooms and cover.

Now if you are in a hurry and using really good quality minced beef like the minced steak from Farmers Choice, all you need to do is simmer this on the hob, stirring frequently, until the carrots are tender – about 15 minutes. But if you are using cheaper mince it will benefit from long slow cooking in a low oven. In fact if you have time, it is worth doing this even if you are using top quality mince as it gives the filling a creamy, unctuous texture.

When cooked, turn it out into the dish you are going to cook and serve it in. If you have time, allow it to cool a little as the gravy will thicken so the topping doesn’t sink in.

Now make the topping  - bring a large pan of salted water to the boil and add the swede. Cook for 5 minutes then add the potatoes. Cook for another 5 minutes and add the squash, then continue cooking until all the veg are very soft – about another 10 minutes. Drain and mash with lots of black pepper. You may like to add a knob of butter, but the squash will mean your mash is very soft, so only add a little and don’t add any milk. I like to use a potato ricer – not only does it give a lovely light, lump free mash but it will hold back any fibrous bits in the swede.


Spread the mash over the mince, fork into ridges on the top, dot with a few flecks of butter and bake in a hot oven until browned. The squash and swede give the topping a lovely golden colour and of course sneak extra veg into the dish, but a green vegetable on the side is still delicious!
 
 
Print Friendly and PDF

I am sharing this with Extra Veg at Veggie Desserts,  Utterly Scrummy Food 4 Friends and Fuss Free Flavours

Extra Veg Blog Linky  

Numbers at Cardz 4 Guyz

It's time for our weekly challenge at Cardz 4 Guyz and this week we want to see a number or numbers on your card. It could be for a birthday or an anniversary, but I've chosen to use an image that features numbers - a pool game!

The toppers I have used come from a super-useful set of male themed card toppers available from Foil Play  - so useful for making quick cards for men - and I made the Double Diamond card from a single sheet of 12 x 12 card, using my Hougie board for all the scoring and measuring. It looks terribly complex but in fact only took about 5 minutes to make! the instructions are in the book "Everyone needs a Hougie - 3". I've searched around for an online tutorial but they all look far more complicated than the one in the book, and the great bonus of the version I've used is that there is a top flap which tucks neatly into the pocket formed by one of the diamonds - so the card becomes it's own self-contained envelope! How cunning is that?


Monday 26 October 2015

Sketch Time at Less is More

The challenge at Less is More this week is a sketch - and what a simple sketch it is!


I made my partial banner using a stamp that is meant to attach to a roller that dispenses its own ink - I never got on very well with the roller so I got rid of that and now I use the stamps on an ordinary acrylic block. It has the advantage of being able to be used with any ink, as well as being easier to position accurately. For this card I used Memento ink and coloured the images in with Promarkers. The dragonflies are actually two quite different shades of blue in real life.

The sentiment is a useful little stamp that was free with a magazine recently.

Sunday 25 October 2015

Rude-olph Day!

It's the 25th of the month today, and that means Christmas is only two months away and it's Rudolph Day at Scrappy Mo's  - from the 25th of every month until the end of the month, it's a chance to share our Christmas makes and a reminder to keep making those cards all year round!

I used an image and paper from the La Pashe CD "Christmas with the Wrinklies" and paired it with a slightly rude sentiment from the Dylusions Christmas Words stamp sheet - I am totally in love with the Dylusions sentiments! So, today for me it's not so much Rudolph Day as RUDE-olph Day!

Rainbow butterflies

Fist of all, sorry for the radio silence of the last few days. I've been away to visit my Mum, and get her Christmas shopping done, and I can seldom get online when I'm there, so I've not been posting or commenting. And now I'm home and have chance to catch up and visit all the blogs I love, my Bloglovin feed seems to be broken and I can't see which blogs have new posts! Anyway, all Mum's presents are bought and wrapped, one less thing for her to worry about, so now I'll do what I can to catch up!

I don't know about you, but I'm getting rather jaded with all the Autumn/Halloween crafting that's going on at the moment and have found myself yearning to use some lovely fresh, bright spring and summer colours. So I had a delve into my snippets box and came up with a lovely selection of Core-dinations snippets. I layered up strips of them to partly-cover the front of a card blank, stamping the greeting first, then used the snippets-of-the-snippets to punch two butterflies in each colour and arranged them on the strips and to form a border on the white part of the card.


Naturally, I'm dropping in to Pixie's Snippets Playground to join the 200th challenge party,
 and I'm also playing along with Challenge #4 at the new blog Cardz 4 Galz, as this week's challenge is CAS. And apologies to the DT, I did promise to join in right from the start, but the inspiration particles just didn't seem to hit me in the right spot!

Wednesday 21 October 2015

RECIPE: Autumn Harvest Braised Beef


Here is another of my recipes for Farmers Choice, who sent me the beautiful braising steak, bacon and Hampshire Honey that I have used in making it.

 
Autumn Harvest Braised Beef (serves 2)

340g braising steak, cut into 2 pieces
4 rashers streaky bacon, rinded and cut into squares
1 medium onion, thinly sliced
1 small Bramley apple
1 cob of sweetcorn, cut into 4 mini-cobs
125g chestnut mushrooms, thickly sliced
350ml dry cider
1 tbs Hampshire Honey
1 tbs plain flour, seasoned with salt and pepper
2 bayleaves
1 tbs chopped fresh thyme
1 dessertspoon rapeseed oil
small knob (about 10g) of butter

 Heat the oven to 160 C/140 fan/gas mark 3.

 Heat the oil in a wide, lidded flameproof casserole dish, adding the butter when the oil is hot.  When the butter is melted, add the onions and bacon and fry gently, stirring frequently, for about 10 minutes until the onions are soft and the bacon starting to colour. Meanwhile roll the slices of beef in the seasoned flour.

Push the onions and bacon to the side of the pan, add the beef and cook for 3-4 minutes on each side then remove the meat to a plate and keep warm. Add the mushrooms to the pan and mix in with the onions and bacon, and cook for about 5 minutes until softened.

 Peel and core the apple and cut it into 8 wedges.


Remove the pan from the heat and stir in any flour left over from coating the meat, then blend in the cider, honey and herbs. Return to the heat and bring back to the boil, stirring. Place the meat back in the pan,  turning it well in the sauce, then arrange the corn and apple around it. Place in the oven to cook for 1½ to 2 hours until the meat is tender, stirring once or twice during cooking. The apple will fall into the sauce giving it a delicious autumnal tang.
 
 
With meat, fruit, veg and carbs from the corn, this would make a well balanced meal on its own, but being greedy we served it with runner beans and mashed potato to mop up all the appley, herby sauce.

  Print Friendly and PDF

Cooking with Herbs
I am sharing this recipe with Cooking with Herbs at Lavender and Lovage

Tuesday 20 October 2015

Pretty Plump Pink Pumpkins

... which sounds very much like something I might have created for the last Sisterhood of Snarky Stampers challenge, which was B is for Boobies. But no, it's for the new challenge which is H is for Pink Halloween.

Now I don't really bother much with Halloween - I've shared a couple of cards this year but neither has used any actual Halloween Schtuff, because I don't actually have any. So I've been keeping my eyes open for Halloween ideas that don't need any tailor made bits of kit, and I've seen these pumpkins made from punched and die cut ovals and circles on several blogs recently. Each one id just three identical shapes, inked a bit at the edges and stuck together with a scrap of green for a stalk. So I thought, why not make some  in pink? And then create a swirling autumn mist with a layer of pink swirly vellum over my base card? And what about a finishing touch of a bit of glossy accents for a shining highlight?

What do you mean, pumpkins don't shine? Pumpkins aren't pink either!

But my pumpkins shine AND they are pink. Take that any way you like..... but keep your hands off my pumpkins.

I put a spell on you at Cardz 4 Guyz

This week the theme at Cardz 4 Guyz, chosen by Caz, is "I put a spell on you", thinking, of course, about Halloween which will soon be with us.

Now I'm not a big fan of Halloween and tend not to have much suitable stuff for it, so when I won some printed image sheets at Suzy Bee's Blooming Challenge I chose all Halloween images, so I wouldn't be quite as stuck for things to make this year. This one, with the witch, pumpkin and goblins dancing in a circle, watched over by an owl, looked perfect for the challenge, and suitably masculine.

I wanted to add some bats,  but with neither stamp nor die I thought I was going to have to hand draw them - until I saw a handy tip on the Fiskarettes UK Facebook page  showing how to convert punched butterfly shapes into bats. I used my old Cuttlebug die to cut some black butterflies and chopped them down to create BATterflies! The eyes are added with a white gel pen.

All the papers are snippets from my stash. I've added black and cream patterned washi tape and buttons, and edged everything with some black peel offs that remind me of bones.


With Halloween approaching fast, there are lots of challenges around to share this card with!

The Male Room - Halloween
Pixie's Snippets Playground - week 199 (all the papers were snippets)
Crafty Gals Corner - Witches, Ghouls and Goblins
The Crafters Café - Black, purple, orange and/or ghosties
Glitter'n'Sparkle - Halloween - cute or spooky
That Craft Place - Halloween    

Monday 19 October 2015

Oh dear deer!

The new challenge at CD Sundays is Baby Love. I didn't really want to make a new baby card - I did rather a lot of them over the summer with a new grandchild of my own and several friends having new children/grandchildren, so I decided to use an image of a mother and baby animal instead.

I have used the "Daycare" section of the beautiful Design House CD "Meadow's Edge" to print the corner pyramid design sheet and a matching backing paper. Some matting, a peel off greeting and a couple of brads were the only other things needed.


RECIPE: Chicken satay with fragrant rice and butternut squash

After taking a break over the summer, for family reasons, I'm back with a new series of recipes for Farmers Choice who deliver a wonderful range of free range and responsibly sourced produce. Today I have an Asian style meal for you. Please don't be put off by the long recipe - each stage is easy and  lots of the preparation can be done in advance.

Chicken satay with fragrant rice and butternut squash (serves 4)

Satay literally means “three pieces” and the meat should be cut into bite sized pieces and three placed on each stick,  but long, thin strips of chicken are often easier to handle and cook. Satay is a street food and isn’t usually served alongside rice and a vegetable like this, but I think it is a delicious part of a main meal and served like this, makes a great Indonesian style (just  style, I’m not making any claims to be authentic!!!) feast.

For the chicken – start to prepare 1-2 hours in advance

 2 skinless, boneless chicken breasts
1 tbs dark soy sauce
1 tsp Hampshire honey
½ tsp ground coriander
½ tsp ground turmeric
1 tsp rapeseed oil
approx. 12-16  wooden  medium length skewers or satay sticks

 Soak the sticks  in water while marinating chicken.

Mix the soy sauce, honey, oil and spices together.

Cut  the chicken into long, thin strips and place in the marinade. Leave for 1-2 hours.

10-15 minutes before the rice and squash are ready, thread onto the soaked skewers and grill for about 5 minutes on each side until cooked right through.


For the sauce  - can be made in advance (if you promise not to eat it before the meal is ready!)

2 heaped tablespoons smooth peanut butter
1 tbs dark soy sauce
1 tsp Hampshire Honey
½ tsp dried crushed red chilli flakes (optional)
juice of 1 lime
200 ml water

Heat all ingredients together, stirring constantly. As it comes close to boiling, it will appear to curdle, but just keep stirring and after a few seconds of boiling it will come together to form a smooth paste. Set aside to cool. This makes a very thick sauce – you can thin it down with water or coconut milk if you prefer it thinner. We love a really thick sauce so you can scoop up lots of it when you dip the satay into it!

For  the squash

 ½ medium butternut squash, peeled and cut into roughly 2cm cubes
1 medium onion, thinly sliced
1cm piece of fresh ginger, grated
1 red chilli, finely sliced
1 tsp Hampshire Honey
1 small (150ml) can coconut milk
a little rapeseed oil
salt

Heat a drizzle of oil in the bottom of a pan with a well fitting lid. Gently fry the onion until softened, then stir in the squash, ginger and chilli and continue to cook, stirring frequently, for 3 or 4 minutes. Mix in the honey, coconut milk and salt to taste, and simmer for 20-25 minutes until squash is tender. Stir frequently and keep an eye on the level of the liquid; there should be a very small amount left when the squash is tender, so top up with a little hot water if it starts to look too dry.


For the rice:

 Simply cook the rice in your favourite way (I like to use an electric rice boiler) but for each 4 portions add 1 stalk of crushed lemongrass, 1 star anise and 2 bayleaves to the water before you start to cook.

 Serve the rice and squash topped with the grilled sticks of chicken and a small bowl of sauce for dipping the chicken in.

This makes a complete meal, but you can make it into a real feast by adding some extra treats – prawn crackers, raw or fried bananas, salted peanuts or cashews, sliced boiled eggs, shredded cucumber, chunks of fresh pineapple…… I’ll have to stop here, I’m getting too hungry!


Print Friendly and PDF

Sunday 18 October 2015

A Friendship card

For today's card, I dug really deep into my stash, and pulled out the remains of an old Hot Off The Press sentiments booklet and  the snippets from a Paper Pizzazz 12x12 pad that I think was called something like Tiny Prints.

I find the sentiments are usually rather "flat" in appearance when used on a card, but this time I not only inked the edges but added some stamping, to really "take ownership" as they say in BS-ese, of the design.

Lots and lots of layering, lots of inky edges, a bit of punching and some ribbon and buttons added together to complete the card. I decorated the inside as well, to use "part 2" of the sentiment. Obviously the inside  needs to be kept flatter, plus I wanted to make sure there was one relatively plain, uncluttered panel for the sender to write in. And the layout is slightly different simply because I was using up snippets so by the time I got to the inside, I had to juggle around with what was left.


I'm joining in the following challenges:

Alphabet Challenge - R for Ribbon
Crafty Hazelnut's Patterned Paper Challenge - October
Pixie's Snippets Playground - week 199
Allsorts Challenge Blog - All sentimental   

Saturday 17 October 2015

Masculine at Less is More

As you know, I love making masculine cards so I was delighted to see the new theme at Less is More is "Masculine". And just as I was reading this week's post about it, the post-MAN arrived bringing my latest stash purchase, a jar of Ranger Sticky Embossing powder. So I knew exactly what my first make for the challenge would be. If I get chance I'll be back again later in the week with another.

For this card I stamped the cog cluster from the Viva Décor "Old fashioned" set in black ink and then embossed it with my new Sticky powder, then foiled it with a matte silver foil from Foil Play - the overall effect is an "aged metal" look.

Then I used one of the Studio G mini stamp sets to stamp the birthday ticket. I thought about stamping this on coloured paper and then sticking it on the card, but I felt the harsh monochrome scheme kept the look more masculine.

The mini stamp set has half a dozen different sentiments that can be added to the ticket, so I couldn't resist making a second card exactly the same but with a different sentiment!


More falling leaves - lots of them!

I've pulled lots and lots of old stash out of my drawers for this card - the horse chestnut leaf is the very first stamp I ever bought, about 20 years ago. It is a Personal Impressions one, so old the design mane/number has worn off,  and although I have added hundreds and hundreds of stamps to my collection over the years, it is still one of my favourite and most versatile stamps. I stamped it with brown wink, embossing some of the images with a copper sparkle powder and the others with a variegated one called "Wild tiger", also both very early purchases along my crafting journey.

The metallic peel offs were part of a kit I bought from QVC when I first started watching it. That was when my older daughter was doing her A levels, and she is 36 now, so you can imagine how old they are!

The lovely autumn leaf backing paper that I've used on the inside of the card is less than a year old, a positive baby, part of a sheet from the DCWV stack 9 that I got back in the early spring, and the embossed and inked foil is left over from a previous project.

I made an acetate window in the front of the card so that the paper on the inside would form part of the overall design.


I'm joining in with

Sweet Stampin' - "Antiques Roadshow" - your oldest stamp (and I've included some other old stuff too!)
Fan-tastic Tuesday - Autumn Colours
Suzy Bee's Blooming Challenge - Autumn Colours
Ruby's Rainbow - Autumn Leaves
Shopping Our Stash - I can see clearly